


")


If you’ve read about why tracking pixels matter, this is where things become practical.
This guide walks through exactly how to use tracking pixels on HeyLink.me—step by step—with zero fluff and lots of clarity.
👉 New to tracking pixels? Start here first: What Is a Tracking Pixel (And Why It Matters for HeyLink.me)
👉 Prefer another language?
- Read the full setup guide in Bahasa Indonesia: Cara Menggunakan Tracking Pixel di HeyLink.me
- Or follow the guide in Thai: วิธีใช้ Tracking Pixel บน HeyLink.me
Let’s get into it.
Step-by-Step: How to Add a Tracking Pixels to HeyLink.me
This is the part most people overcomplicate.
It isn’t.
Follow this structure carefully.
Step 1 – Create Your Pixel in Meta
- Go to Meta Ads Manager
- Open Events Manager
- Click “Connect Data Sources”
- Choose Web
- Select Meta Pixel
- Name your pixel
- Create
Meta will automatically generate a code snippet.
Copy it.
Do not modify it yet.
Step 2 – Access HeyLink.me Dashboard
Log into your HeyLink.me dashboard.
Head into the “Integrations” or ”SEO” tab in your dashboard. Find the “TRACKING” block. You will see the “Connect Pixel” section at the top of the block.
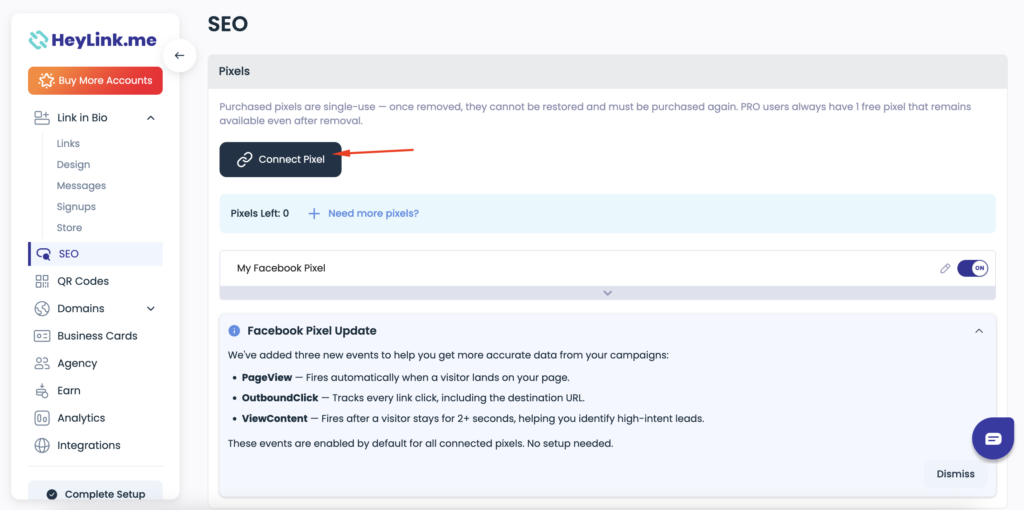
HeyLink.me allows users to insert tracking scripts into their link page globally – meaning it loads for every visitor.
That’s exactly what you want.
Step 3 – Paste the Pixel Code
Paste your Pixel ID (or full pixel code, depending on your setup) into the “Add Pixel ID” input area.
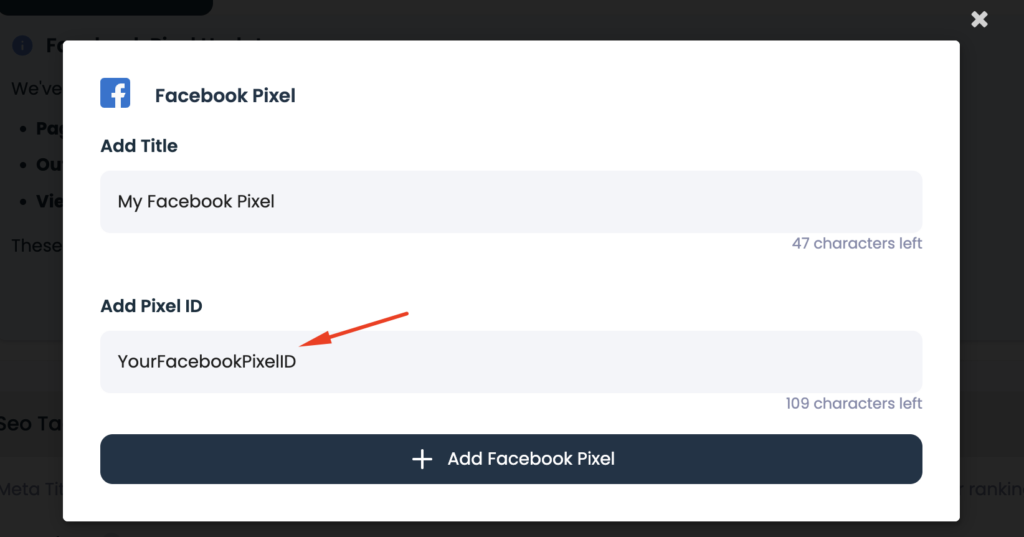
Save changes.
That’s it.
Seriously.
Sometimes marketing feels complex because people overtalk it. The actual integration takes minutes.
** While this guide focuses on Meta Pixel as an example, HeyLink.me also supports other tracking pixels, like TikTok Pixel, and more—so you can expand tracking beyond Facebook as your strategy grows.
How to Verify Your Pixel Is Working
Don’t skip this. Ever.
Installing code without testing is like mailing a package without checking the address.
To verify:
- Install the Meta Pixel Helper Chrome extension
- Visit your HeyLink.me page
- Click the extension icon
- Confirm the pixel fires
You should see:
- Pixel ID detected
- PageView event triggered
If it’s not firing?
Check for:
- Missing script tags
- Code pasted in wrong section
- Cache issues
Testing is boring. Do it anyway.
Common Mistakes HeyLink.me Users Make
Even smart marketers mess this up.
Here’s what to avoid:
1 – Installing Multiple Pixels Incorrectly
Stacking several tracking scripts without proper configuration can cause conflicts.
2 – Forgetting to Test
Blind implementation leads to broken campaigns.
3 – Not Setting Up Custom Conversions
Page views alone aren’t enough. Track meaningful actions.
4 – Ignoring Privacy Policies
If collecting data, you need a privacy policy stating it clearly. This builds trust and avoids compliance headaches.
5 – Letting the Pixel Sit Unused
A pixel only works if connected to active campaigns.
Setup without strategy equals wasted potential.
Final Thoughts
Installing a tracking pixel on HeyLink.me isn’t complicated.
But using it properly? That’s where the real advantage is.
Once everything is set up and verified, you’re no longer guessing what your audience does—you’re seeing it clearly.
And that’s where better decisions (and better results) come from.


